How to Build a Clinical Laboratory Management System in Laravel: Tests, Components & Results
Introduction
A clinical laboratory management system helps laboratories manage patients, laboratory tests, test components, sample information, pricing, and diagnostic reports through a centralized application.
Developing this type of system requires more than creating basic CRUD operations. Laboratory tests often have complex structures. A single test may contain multiple components, some components may be reported separately, and each test may require specific units, reference ranges, and result values.
For example, a Complete Blood Count (CBC) test can contain several parameters, including:
- Hemoglobin (Hb)
- Red Blood Cell Count (RBC)
- White Blood Cell Count (WBC)
- Platelet Count
- Hematocrit (HCT)
Each parameter has its own result, unit, and reference range. However, the laboratory may sell and assign the CBC as a single test.
To manage this structure effectively, we can use Laravel, Eloquent relationships, and a relational database.
In this tutorial, we will explore how to build the foundation of a clinical laboratory management system using Laravel. We will focus on test configuration, parent-child relationships, test components, patient test assignments, and the architecture required for laboratory result processing.
1. Understanding the Clinical Laboratory Workflow
Before writing code, it is important to understand how the system works.
A typical laboratory workflow consists of the following steps:
- Configure laboratory tests.
- Define test components and sub-analyses.
- Configure sample types, units, and reference ranges.
- Register a patient.
- Create a laboratory order or group.
- Assign one or more tests to the order.
- Collect and track the required samples.
- Enter or import laboratory results.
- Validate and authorize the results.
- Generate and print the laboratory report.
Each stage has a specific responsibility.
For example, the test configuration defines what a laboratory can perform, while the order records which tests have been requested for a particular patient.
Keeping these responsibilities separate makes the application easier to maintain and extend.
2. Designing the Test Database Structure
The first important component is the tests table.
In a laboratory system, a test can represent an independent investigation or a group of related parameters.
For example, a CBC test may have several child records representing its individual components.
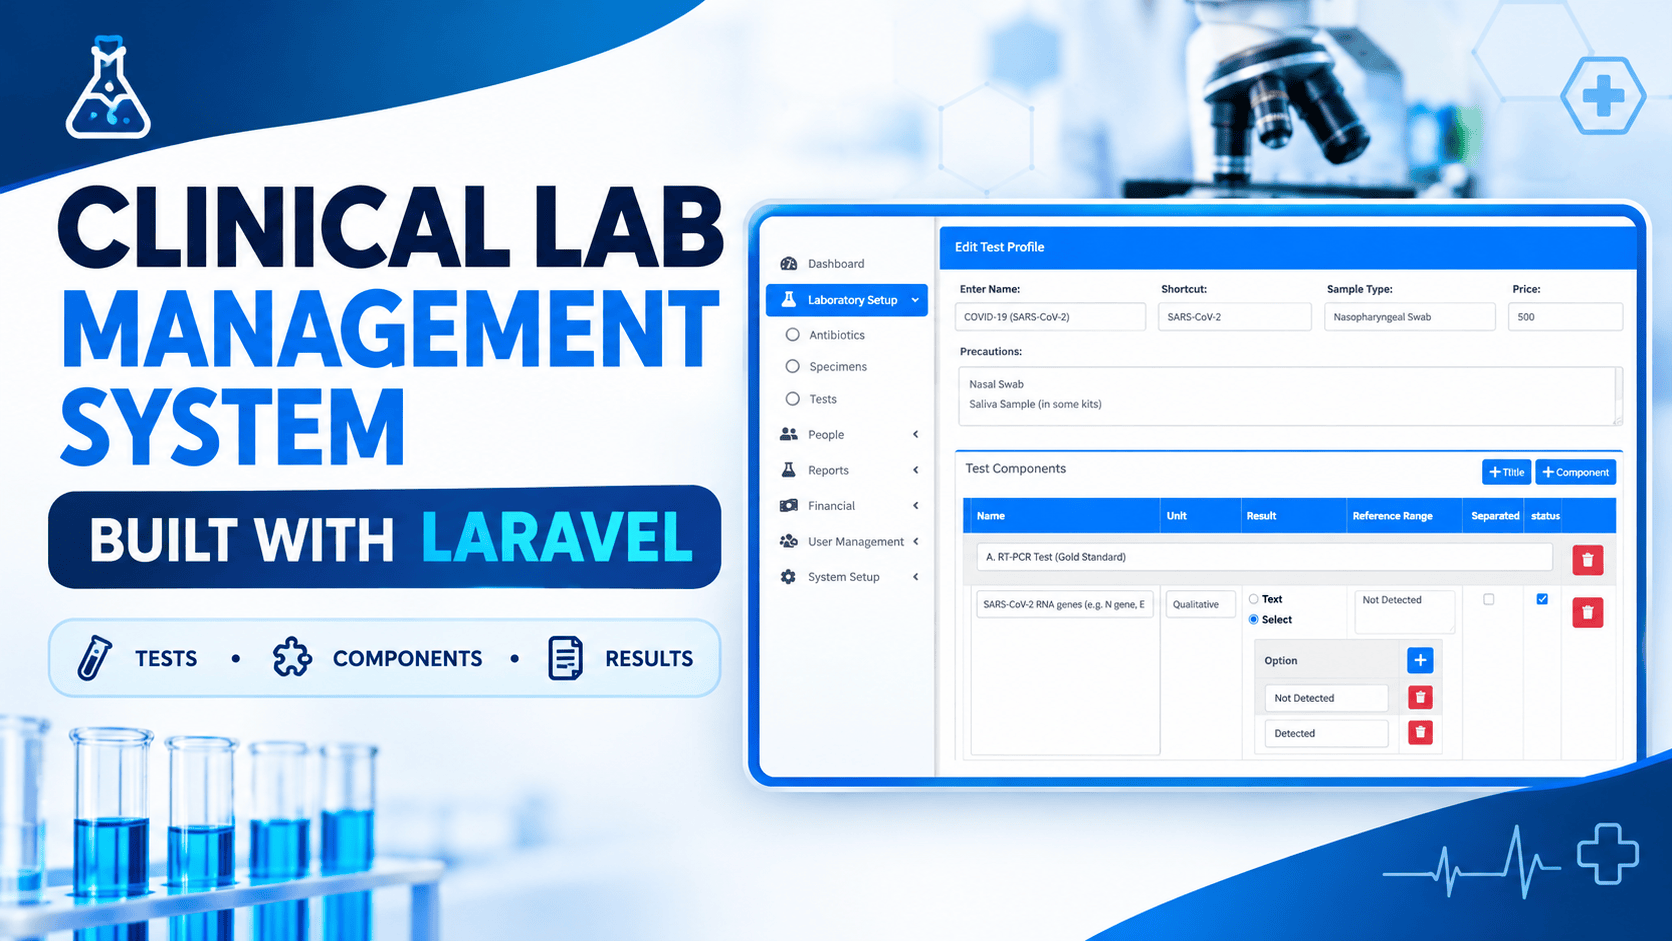
A simplified database structure might contain these fields:
FieldPurpose
id ->Unique test identifier
parent_id ->Identifies the parent test
name ->Test or component name
shortcut ->Short name or abbreviation
sample_type ->Required specimen type
unit ->Measurement unit
reference_range ->Configured reference interval
type ->Test classification
separated ->Indicates whether a component is independently selectable
price ->Configured test price
status ->Indicates whether the test is active
title ->Additional display information
precautions ->Preparation or precaution instructions
Your Laravel model defines the fields that can be mass-assigned:
protected $fillable = [
    'parent_id',
    'name',
    'shortcut',
    'sample_type',
    'unit',
    'reference_range',
    'type',
    'separated',
    'price',
    'status',
    'title',
    'precautions'
];
This allows Laravel to assign the specified attributes when creating or updating a model through mass assignment.
For example:
$test = Test::create([
    'parent_id' => 0,
    'name' => 'Complete Blood Count',
    'shortcut' => 'CBC',
    'sample_type' => 'Blood',
    'price' => 1200,
    'status' => 1,
]);
This example assumes that the database schema supports these fields and that the application's validation and model configuration are in place.
In production, use a dedicated validation step before creating a test. Also, consider representing the absence of a parent with NULL rather than 0 if that matches your database design.
3. Understanding Parent and Child Tests
The parent-child relationship is one of the most important parts of this architecture.
Instead of creating a separate database table for every type of test component, we can store parent tests and child components in the same tests table.
For example:
Parent test: Complete Blood Count (CBC)
```html
<table border="1" cellpadding="6" cellspacing="0">
    <thead>
        <tr>
            <th>ID</th>
            <th>Parent ID</th>
            <th>Name</th>
            <th>Unit</th>
        </tr>
    </thead>
    <tbody>
        <tr>
            <td>10</td>
            <td>0</td>
            <td>Complete Blood Count</td>
            <td>—</td>
        </tr>
        <tr>
            <td>11</td>
            <td>10</td>
            <td>Hemoglobin</td>
            <td>g/dL</td>
        </tr>
        <tr>
            <td>12</td>
            <td>10</td>
            <td>RBC Count</td>
            <td>million/µL</td>
        </tr>
        <tr>
            <td>13</td>
            <td>10</td>
            <td>WBC Count</td>
            <td>cells/µL</td>
        </tr>
        <tr>
            <td>14</td>
            <td>10</td>
            <td>Platelet Count</td>
            <td>cells/µL</td>
        </tr>
    </tbody>
</table>
```
Here, record 10 represents the main test.
Records 11–14 represent the individual components associated with that test.
The parent_id field establishes the connection between the parent and its children.
This structure is useful because different laboratory investigations have different numbers of components. A single test may have two components, while another may have twenty or more.
A self-referencing relationship allows the application to support these different structures without creating a new table for each test.
4. Defining Eloquent Relationships in Laravel
Laravel Eloquent makes it possible to define database relationships directly in the model.
Your Test model contains three important relationships:
- components()
- sub_analyses()
- options()
Let's understand each one.
4.1 The components() Relationship
Your model defines the following relationship:
public function components()
{
    return $this->hasMany(Test::class, 'parent_id', 'id')
                ->orderBy('id', 'asc');
}
This is a self-referencing one-to-many relationship.
The relationship tells Laravel that one test can have multiple child records in the same table.
The arguments mean:
- Test::class: The related records use the same model.
- parent_id: The foreign-key column on the child records.
- id: The local key on the parent record.
The orderBy('id', 'asc') clause sorts the components by their database IDs in ascending order.
To retrieve a test and its components:
$test = Test::with('components')->findOrFail($id);
You can then access its components:
foreach ($test->components as $component) {
    echo $component->name;
}
This approach is useful when displaying a test configuration form or preparing the structure of a laboratory report.
Important: The relationship shown above retrieves direct children only. It does not automatically retrieve grandchildren or deeper levels of nesting.
4.2 The sub_analyses() Relationship
Your model also defines:
public function sub_analyses()
{
    return $this->hasMany(Test::class, 'parent_id', 'id')
                ->where('separated', 1);
}
This relationship retrieves child records whose separated field equals 1.
The distinction is important because not every component needs to be available as an independent orderable test.
For example, a laboratory might configure a panel containing several parameters but allow one particular analysis to be ordered separately.
The separated flag can help represent this business rule.
To retrieve separated sub-analyses:
$test = Test::with('sub_analyses')->findOrFail($id);
You can access them using:
foreach ($test->sub_analyses as $analysis) {
    echo $analysis->name;
}
However, separated should not automatically be treated as proof that a component is a complete standalone test. The application should also validate whether the component has the required pricing, sample information, and other configuration.
If the system uses several levels of nested analyses, you may need an additional recursive relationship or a different data structure.
4.3 The options() Relationship
The third relationship is:
public function options()
{
    return $this->hasMany(TestOption::class, 'test_id', 'id');
}
This relationship connects a test to its associated options.
The exact meaning of these options depends on the application's database design.
For example, options might represent predefined result choices, qualitative outcomes, or other test-specific configuration.
To retrieve a test and its options:
$test = Test::with('options')->findOrFail($id);
The important point is that the options() relationship is different from components().
Components represent related test records, while options represent records stored in the test_options table.
Keeping these relationships separate helps maintain a clear data model.
5. Selecting Tests for a Laboratory Order
After configuring tests, the application needs a way to display selectable tests when creating a laboratory order.
Your GroupController contains the following query:
$tests = Test::where('parent_id', 0)
    ->orWhere('separated', true)
    ->get();
This query retrieves records that satisfy either of these conditions:
- The test has parent_id = 0.
- The test has separated = true.
The purpose is to display top-level tests and components that can be selected independently.
For example, the selection list might contain:
- Complete Blood Count
- Liver Function Test
- Renal Function Test
- A separately orderable analysis
This is a useful starting point for a laboratory order form.
However, there is an important detail: the query does not filter by status. If inactive tests should not be available for new orders, the query should explicitly account for that requirement.
For a system where 0 represents the absence of a parent, you could write:
$tests = Test::where('status', 1)
    ->where(function ($query) {
        $query->where('parent_id', 0)
              ->orWhere('separated', true);
    })
    ->orderBy('name')
    ->get();
This version groups the two selection conditions and applies the active-status condition to both.
If the application uses NULL for parentless records, adjust the condition accordingly.
Also, remember that separated = true may include a nested record regardless of its depth. If only certain component levels are orderable, the selection query should enforce that rule.
6. Understanding the Group Model and Laboratory Orders
In your application, the Group model appears to represent a laboratory order or patient test group.
A group can contain multiple tests and cultures.
The controller retrieves the available tests and cultures and passes them to the view:
public function create()
{
    $branches = Branch::orderBy('id', 'desc')->get();

    $patients = Patient::orderBy('id', 'desc')->get();

    $doctors = Doctor::orderBy('id', 'desc')->get();

    $contracts = Contract::orderBy('id', 'desc')->get();

    $tests = Test::where('parent_id', 0)
        ->orWhere('separated', true)
        ->get();

    $cultures = Culture::orderBy('id', 'desc')->get();

    return view(
        'admin.groups.create',
        compact(
            'branches',
            'patients',
            'doctors',
            'contracts',
            'tests',
            'cultures'
        )
    );
}
This method prepares the data needed by the order-creation form.
The form can display patients, doctors, branches, contracts, tests, and cultures.
When the user submits the form, the application creates the group and assigns the selected investigations.
This separation between test configuration and order creation is fundamental to a maintainable laboratory system.
7. Saving a Laboratory Order and Its Tests
Your store() method creates the group first:
$group = Group::create(
    $request->except(
        '_token',
        'tests',
        'cultures',
        'DataTables_Table_0_length',
        'DataTables_Table_1_length'
    )
);
The code excludes the selected tests, cultures, CSRF token, and DataTables length parameters from the group attributes.
It then processes the selected tests separately.
Your current implementation is:
if ($request->has('tests')) {
    foreach ($request['tests'] as $test) {
        $price = Test::find($test)['price'];

        GroupTest::create([
            'group_id' => $group->id,
            'test_id' => $test,
            'price' => $price
        ]);
    }
}
Let's examine the process step by step.
Step 1: Create the group
The application creates the main order record.
Step 2: Read the selected test IDs
The submitted tests array contains the test identifiers selected by the user.
Step 3: Retrieve the configured price
The controller retrieves the price from the corresponding test record.
Step 4: Create the group-test relationship
The application inserts a record into the group_tests table.
A simplified example might look like this:
```html
<table border="1" cellpadding="6" cellspacing="0">
    <thead>
        <tr>
            <th>ID</th>
            <th>Group ID</th>
            <th>Test ID</th>
            <th>Price</th>
        </tr>
    </thead>
    <tbody>
        <tr>
            <td>1</td>
            <td>100</td>
            <td>10</td>
            <td>1200</td>
        </tr>
        <tr>
            <td>2</td>
            <td>100</td>
            <td>20</td>
            <td>1800</td>
        </tr>
        <tr>
            <td>3</td>
            <td>100</td>
            <td>25</td>
            <td>900</td>
        </tr>
    </tbody>
</table>
```
In this example, group 100 contains three selected tests.
The group_tests table acts as the association between laboratory orders and configured tests.
It can also store order-specific information, such as the price agreed upon when the order was created.
Storing the price in the order association is useful because the configured price may change later.
For example, if the price of a CBC changes from 1,200 to 1,400, the historical order should generally retain the original agreed price.
A safer implementation
The original code uses Test::find($test)['price'], which can produce an error if the submitted ID does not correspond to an existing test.
A safer implementation validates the submitted IDs and retrieves the required records explicitly.
For example:
$request->validate([
    'tests' => ['sometimes', 'array'],
    'tests.*' => ['required', 'integer', 'distinct', 'exists:tests,id'],
]);

$testIds = $request->input('tests', []);

$tests = Test::whereIn('id', $testIds)
    ->where('status', 1)
    ->get()
    ->keyBy('id');

foreach ($testIds as $testId) {
    $test = $tests->get($testId);

    if (!$test) {
        throw \Illuminate\Validation\ValidationException::withMessages([
            'tests' => 'One or more selected tests are unavailable.',
        ]);
    }

    GroupTest::create([
        'group_id' => $group->id,
        'test_id' => $test->id,
        'price' => $test->price,
    ]);
}
This example validates the submitted identifiers, rejects duplicate IDs, and verifies that the selected records are active.
In a production implementation, validation should also confirm that each selected record is permitted to be ordered independently.
The code above illustrates test assignment only. It should be integrated into a transaction and combined with validation for the group itself.
8. Managing Cultures and Default Report Options
Clinical laboratories may perform microbiology and culture investigations in addition to routine laboratory tests.
Your controller handles cultures separately.
First, it retrieves the root culture options:
$culture_options = CultureOption::where('parent_id', 0)->get();
When a culture is selected, the controller creates a group-culture record:
$group_culture = GroupCulture::create([
    'group_id' => $group->id,
    'culture_id' => $culture,
    'price' => Culture::find($culture)['price']
]);
It then assigns the default culture options:
foreach ($culture_options as $culture_option) {
    GroupCultureOption::create([
        'group_culture_id' => $group_culture['id'],
        'culture_option_id' => $culture_option['id'],
    ]);
}
The workflow is:
- Retrieve the default culture options.
- Create the relationship between the order and the selected culture.
- Create the associations between that culture order and its default options.
This approach can be useful when a culture report starts with a predefined set of fields or choices.
However, the appropriate defaults may differ by culture type. If that is true in your application, filter the available options by the selected culture or its reporting configuration rather than assigning every root option to every culture.
In addition, the culture lookup should be validated before its price is used.
9. Designing the Laboratory Result Workflow
Creating test records and assigning tests to an order are only the first stages of a clinical laboratory system.
The next stage is storing and managing the actual results.
For example, a CBC order may require individual result values for:
- Hemoglobin
- RBC Count
- WBC Count
- Platelet Count
Each result must be associated with the correct patient order and test component.
A result table might include fields such as:
FieldPurpose
id
Unique result identifier
group_test_id
Links the result to the ordered test
test_id
Identifies the test component
result_value
Stores the measured or reported value
unit
Stores the reporting unit
reference_range
Stores the applicable reference interval
status
Represents the result workflow state
entered_by
Identifies the user who entered the result
verified_by
Identifies the authorized reviewer
verified_at
Records the verification time
The exact schema should reflect the laboratory's reporting requirements.
A separate result model is generally preferable to storing every result directly in the tests table.
The tests table defines the test configuration. The result table stores the findings for a particular order.
This separation prevents patient-specific results from overwriting reusable test definitions.
Example: Recording component results
Suppose a patient has a CBC order.
The application retrieves the ordered test and its components:
$groupTest = GroupTest::with('test.components')
    ->findOrFail($groupTestId);
This example assumes that the GroupTest model defines a test() relationship and that the Test model contains the components() relationship.
The application can then display the required component fields in the result-entry form.
The laboratory user enters the observed values, and the application saves them against the appropriate order and component records.
For example:
ComponentResultUnit
Hemoglobin
13.8
g/dL
RBC Count
4.7
million/µL
WBC Count
7.2
10³/µL
Platelet Count
250
10³/µL
These values are illustrative only. Real results must come from the laboratory's measurement process.
The system should validate result formats, preserve appropriate units and reference intervals, and ensure that users cannot modify results outside their permissions.
Why results should be linked to the order
A test definition can be reused for thousands of patients.
However, every patient has a separate order and separate result values.
Linking results to the relevant order prevents data from different patients or visits from being mixed together.
It also supports historical reports, corrections, verification, and audit trails.
10. Generating Laboratory Reports
After results are entered and authorized, the application can prepare a report for printing.
Your controller already contains a print() method:
public function print($id)
{
    $group = Group::with([
        'tests',
        'cultures',
        'patient',
        'doctor'
    ])->findOrFail($id);

    return view('admin.groups.print', compact('group'));
}
This method retrieves the group together with its tests, cultures, patient, and doctor.
The data is then passed to the admin.groups.print Blade view.
The view can display:
- Patient identification and demographics
- Order number and date
- Referring doctor
- Ordered investigations
- Result values and units
- Applicable reference intervals
- Laboratory comments
- Authorized signatures
The actual report structure depends on the relationships and fields defined in the application.
Important: The method shown above retrieves the group and its related records, but it does not itself verify that the results have been finalized or authorized.
Before publishing a report, the application should enforce the appropriate review and authorization rules.
11. Improving Performance with Eager Loading
As a laboratory system grows, the number of patients, orders, tests, and result records can increase significantly.
If relationships are accessed inside loops without eager loading, Laravel may execute unnecessary database queries.
For example:
$group = Group::with([
    'tests.test.components',
    'cultures',
    'patient',
    'doctor'
])->findOrFail($id);
This example assumes that the relevant relationships exist in the Group and GroupTest models.
Eager loading allows Laravel to retrieve related records more efficiently.
It can be especially helpful when generating detailed laboratory reports containing multiple tests and components.
However, load only the relationships needed by the current page. Retrieving every related record for every request can also create unnecessary overhead.
12. Using Database Transactions for Reliable Orders
Creating a laboratory order often requires several related database operations:
- Create the group.
- Assign the selected tests.
- Assign the selected cultures.
- Create the associated culture options.
If an error occurs halfway through the process, the database could contain an incomplete order unless the operations are handled transactionally.
Laravel provides database transactions for this purpose.
For example:
use Illuminate\Support\Facades\DB;

DB::transaction(function () use ($request) {
    $group = Group::create([
        'patient_id' => $request->patient_id,
        'doctor_id' => $request->doctor_id,
    ]);

    // Validate and assign the selected tests here.

    // Validate and assign the selected cultures here.
});
The example assumes that these fields exist on the groups table.
The complete implementation should validate all submitted values and create every required association inside the transaction.
If an exception occurs, Laravel rolls back the transaction, preventing partial database changes.
This is particularly important in laboratory software, where an incomplete order can cause operational problems.
13. Security and Data Integrity Considerations
A clinical laboratory management system handles sensitive patient information and diagnostic results. Security and data integrity must be considered from the beginning.
Important safeguards include:
- Validate every patient, test, culture, and order identifier received from the client.
- Apply authorization policies so users can access only permitted records.
- Use database transactions for related order operations.
- Preserve historical order prices and relevant reporting information.
- Record who entered, modified, and authorized results.
- Prevent unauthorized changes after report authorization.
- Use appropriate access controls for patient information.
- Maintain backups and a tested recovery process.
- Protect diagnostic results against accidental or unauthorized modification.
Reference ranges may vary by age, sex, laboratory method, and other clinically relevant factors. They should not be treated as universal constants.
For this reason, a production system should use laboratory-approved reference intervals and validated reporting rules.
Software-generated flags can assist laboratory workflows, but they should not replace appropriate clinical interpretation or professional authorization.
14. Recommended Architecture
A maintainable Laravel laboratory system can separate its responsibilities into the following areas.
Test configuration
Manages test definitions, components, units, sample types, prices, and reference intervals.
Patient management
Stores patient information and supports the patient registration workflow.
Laboratory orders
Creates orders and connects patients with the selected investigations.
Result processing
Stores measured values, tracks result status, and supports review and authorization.
Culture reporting
Manages culture investigations and their specific reporting options.
Report generation
Prepares authorized results for display, printing, and document export.
Administration and auditing
Controls user permissions, tracks important changes, and supports operational oversight.
This separation helps developers extend the system without placing every responsibility inside one controller.
For example, test configuration can evolve independently of the result-entry interface, while the reporting module can use stable relationships to retrieve the data it needs.
Conclusion
Building a clinical laboratory management system in Laravel requires a clear database structure, well-defined Eloquent relationships, and a reliable workflow for patient orders and diagnostic results.
The Test model provides the foundation for organizing laboratory investigations through parent-child relationships.
The components() relationship retrieves the children of a test, while sub_analyses() identifies child records marked as independently separated. The options() relationship connects a test with its configured options.
The GroupController then demonstrates how the application can display available investigations, create a group, assign tests and cultures, and prepare data for laboratory reports.
The next step is to connect these structures to a dedicated result-processing workflow that supports accurate data entry, validation, authorization, and historical reporting.
By keeping test definitions separate from patient-specific orders and results, developers can build a system that is easier to maintain, more reliable, and better suited to the needs of a clinical laboratory.